From someone who has done it for family thrice
Introduction
Building a HED is a serious and expensive task, you need to consider a minimum of 6 different parts of the computer, all of which have an influence on each other. The minimum 6 are CPU, Motherboard, RAM (also called memory), Storage, Case, and Power Supply. Additionally, you should consider a Video Card and Case Fans as these components will likely have a dramatic impact on the performance of your system. Today we are covering the basics of assembly.
Putting It Together
To put together your PC, you’ll want an area with a large flat surface. I prefer to have about 15sqft or more of space so that I have room to layout all the parts I will be working with alongside the case. This is especially useful when building the motherboard which can have a ton of parts going in at once and you want those parts out for easy installation.
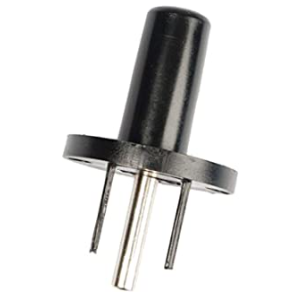
You will also want an anti-static working surface to work on as accidentally discharging static into your brand-new, expensive parts would be inadvisable. One thing of note, there is no such thing as a “wireless” anti-static band, any product labeled this way is deceptive. Now, you should have an anti-static band which is connected to an anti-static working surface upon which should sit your PC case as you build in it. This surface should then also have a connection to the third socket on the power plug, the one that is D-shaped and leads to ground. You will want to connect to the working surface to the plug through a banana jack plug adapter like this one:

The plugs that go to neutral and live are made of plastic and are thus non-conductive, the ground is the only functional connector. Once you’re connected, you can work without worrying about destroying your $1000+ machine.
You will want to start with the power supply, count the power cables and connectors you will need for your parts, the number of SATA power connectors, PCIe power cables, additional CPU power, etc. You will then want to connect the relevant cables to your power supply and route them to the locations most likely to be used once the parts are installed. You want to do this beforehand because it can be difficult to route cables if you have a large graphics card, hard drives, and CPU coolers in the way.
Now, you will build the motherboard. Start with the CPU, install carefully and while grounded to the anti-static surface. Then, add any M.2 drives you may have to your system. You will then add SATA data cables to the motherboard’s ports. Then, you will install the graphics card, if applicable, and finally build the cooler on top of the CPU. You need thermal paste if the cooler doesn’t already have some pre-applied, even if you have paste pre-applied, it is advisable to purchase at least a small amount of thermal paste as you can keep it for re-applying as the paste will dry out eventually. After installing the cooler, you’ll want to install the motherboard with everything now on it into the case. If you have an AIO cooler, this could be a little challenging but should otherwise be simple. One potential problem with installation could be that your graphics card is too big to install in the motherboard first, in this case, you just need to install the board, then add the card. Now all the remaining tasks are cable management and wiring everything up, which is very simple as all the power cables are keyed, so installation is simple.
TL; DR
So, you’ve reached the last hardware step of the build! Congrats! Remember:
- Ground yourself with an actual anti-static setup that is grounded to a power plug.
- Install the power supply first with an eye for pre-routing all the cables to where you expect to have components and connectors.
- Install the CPU and M.2 Drives into the motherboard.
- Install the CPU cooler, keep in mind that some coolers have pre-applied paste, others don’t.
- If your setup allows, install the video card on the board, then the board into the case
- If it does not, install the board into the case, then the video card.
- Then complete the miscellaneous wiring tasks and peripheral installations required to get the computer running