
From the perspective of a new guy
Introduction
Building in WinForms was quite an experience. I helped create a clone of MS paint from scratch with my team members using WinForms, .NET, and C#. We coded in Visual Studio using GitHub, a UML creator, and testing tools integrated into the software. The WinForms systems were fast and effective in creating UI elements for our project to leverage and draw in and today, I want to tell you how to start building in WinForms right now.
Build Walkthrough
Before we begin, this discussion/tutorial uses Visual Studio, if you aren’t using it this article won’t precisely help but I may write one in the future depending on if I decide to use WinForms in the future for more school or personal projects.
Let’s get started:
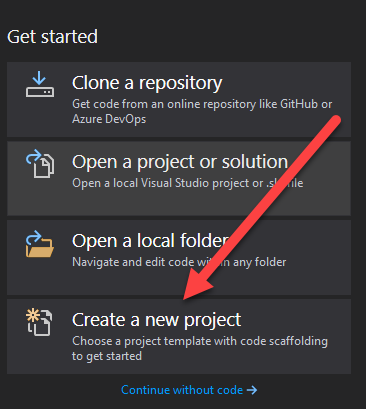
- Run visual studio
- Select “create a new project”
- Have “C#” as your selected language and project type as “Desktop”
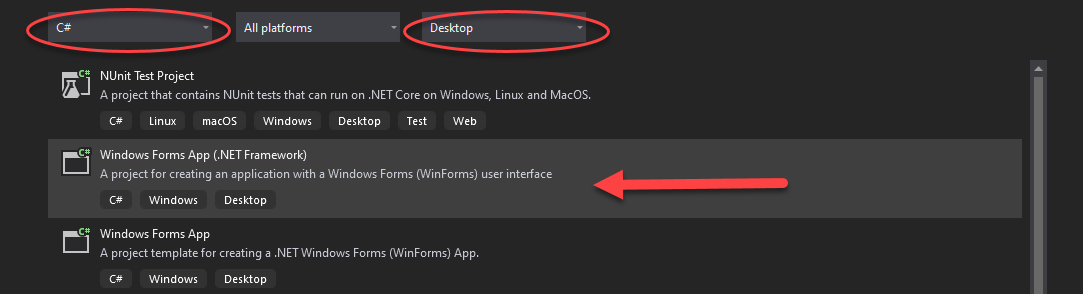
- Near the top should be “Windows Forms App (.NET Framework)”
If you don’t see that option, follow these steps:
- Press Windows key
- Type “visual studio installer”
- Click the icon that appears
- Click “modify” on the version of VS you have
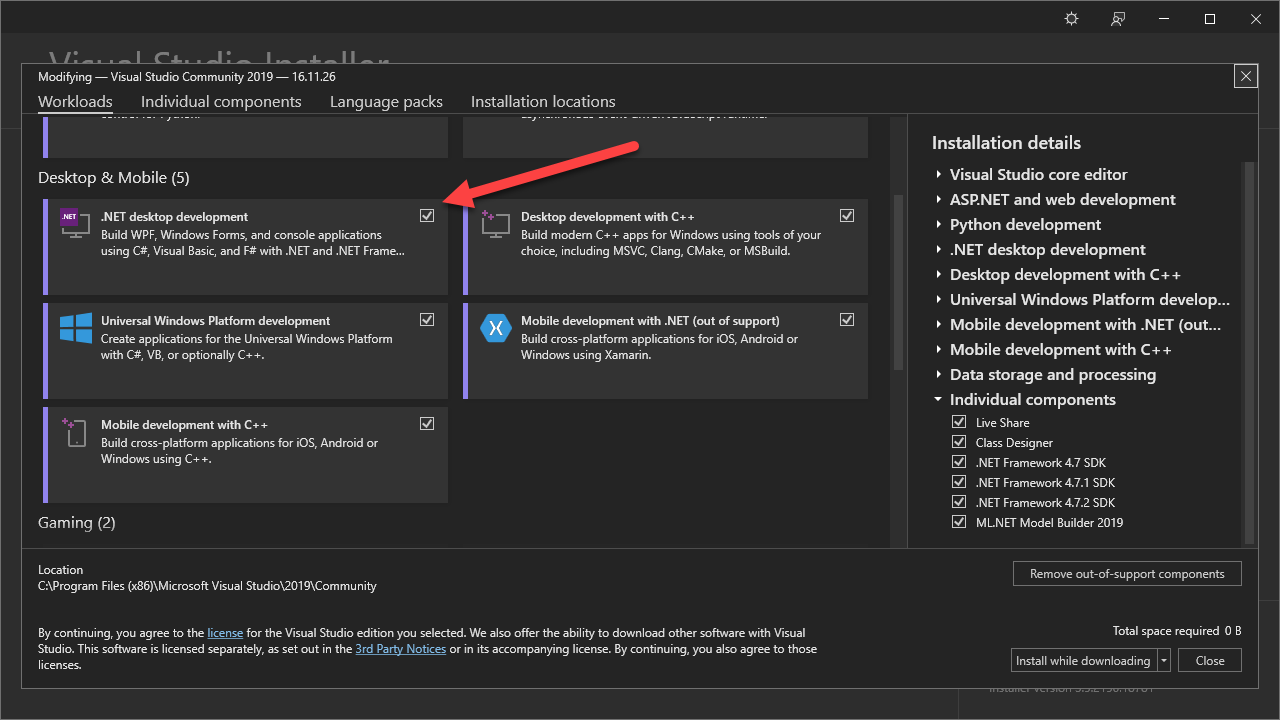
- Under Desktop and Mobile options, you will see .NET desktop environment, select this option
Now, return to step one in the previous paragraph.
Resuming:
- Name your project how you like
- Set location to where you need it/want it
- Leave framework as the default
You will now see a preview page that shows what the blank default app will look like when running. Let’s add a button that displays text.
- We need to add the toolbox, click “view” in the upper left Windows bar, then click “Toolbox” about halfway down

- Now, drag and drop “button” under common tools onto the Form1.cs [design] window you see, where doesn’t matter
- Next click it so that we are sure the properties panel in the bottom right is focused on the button
- Click the lightning bolt at the top of the properties panel to access the actions the button can activate in response to

- Under “Action” select “Click”, you may need to double click, you can rename this button in the text field now populated
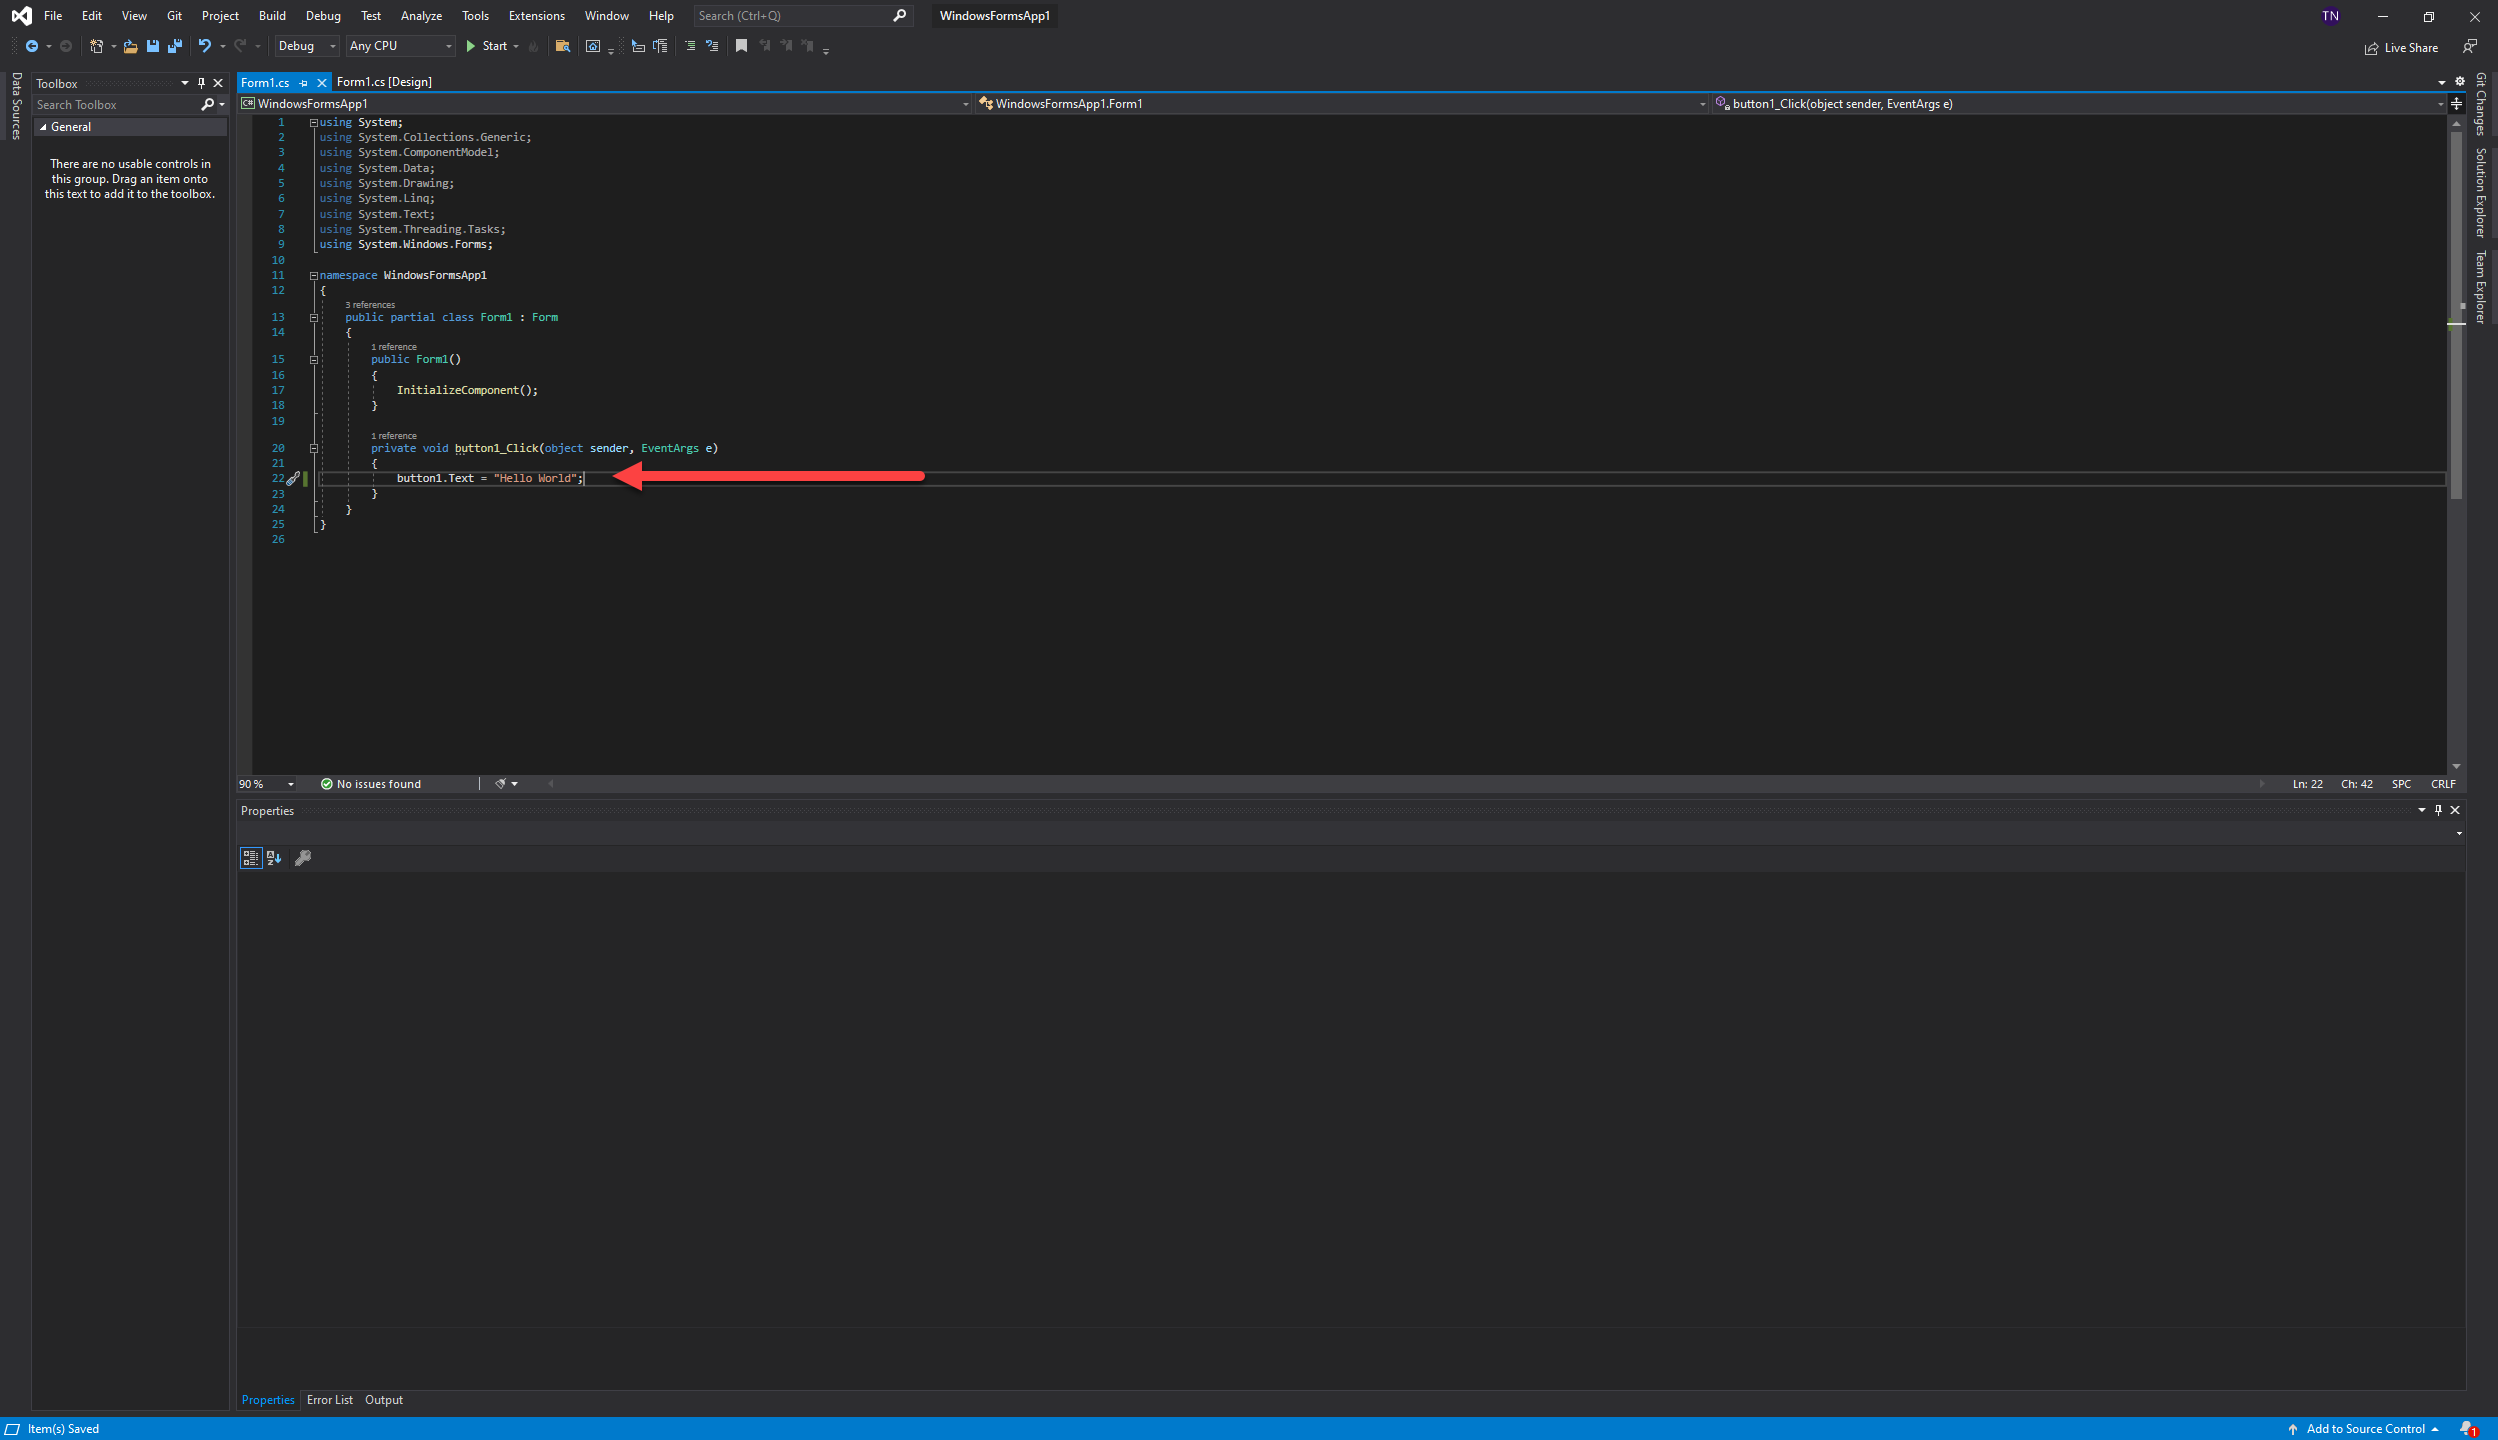
- In form1.cs, you will now see button1_Click(), add the following line: button1.Text = “Hello World”;
- Now press the start button in the top tool bar of VS and click the button
Conclusion
Creating projects with WinForms is simple and fast, you can rapidly modify and add UI elements to have the form and function you need for your projects. In future examples, I will be expanding upon the basics with more intricate code than “print hello world to a button field”. Thanks for reading, more code to come!